Crown molding on high ceilings can make a room feel finished, but it's also where DIY ambition goes to die. I learned this the hard way in my 1920s fixer-upper, standing on a ladder at the top of a 12-foot wall with a miter saw forty pounds of grief below me. Before you buy a single stick of foam or poplar, run the numbers and the angles — because the difference between a great crown install and a wavy disaster is usually a tape measure and a level attitude.
I'm Nora, and I've gutted three old houses in Ohio with my husband Tim, a civil engineer who checks every load calculation I make. The last one had ten-foot ceilings in the living room, which sounds glamorous until you're on a ladder holding a twelve-foot stick of primed pine over your head. So let's talk about what actually makes crown molding on high ceilings different from the same job in a standard eight-foot room: ladders, leverage, and light.
What Counts as "High" and Why It Changes the Math
I start calling a ceiling high when the wall is over nine feet. At eight feet, a standard 3-5/8 inch crown looks right. At ten feet, it shrinks visually. The rule I use: one inch of crown per foot of ceiling height. So a 10-foot ceiling needs 10-inch crown. This changes the physics too. For a 12-foot ceiling, a 2-foot step stool won't cut it. You need a 6-foot ladder, and above 12 feet, rent a scaffold platform — around $75 per day at Home Depot.
This isn't the same as trimming a standard hallway. High ceilings magnify every mistake, which is why the planning step is worth your time.
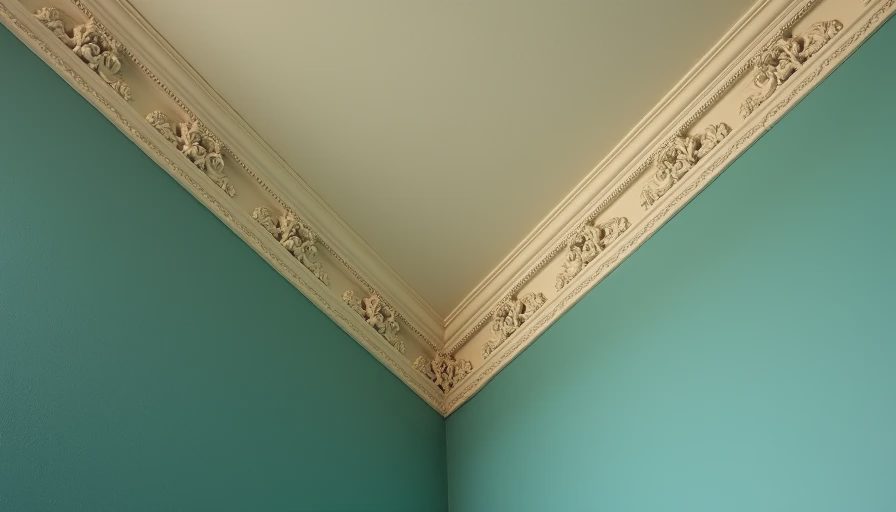
The Budget Breakdown: Crown Molding on High Ceilings, Priced Out
Pre-made foam crown runs $2 to $4 per linear foot; primed pine starts around $1.80. On high ceilings, you're buying wider stock. A 5-1/4 inch finger-joint pine board costs $0.85 per linear foot, but a 7-1/4 inch profile jumps to $1.40. My 80-foot living room cost $210 in materials doing it myself. A contractor quoted $1,150 for the same room, including labor and scaffold rental — about $14 per foot installed.
The savings are real, but the install eats people. I've seen homeowners abandon a project after the first miter joint gaped. Budget 20% extra for waste and one weekend of learning curve. If you hire it out, high ceilings push the price to $18 to $25 per foot in central Ohio. A pro will cope inside corners and scribe the ceiling line when drywall sags — which it always does in an old house.
The Install Sequence That Keeps You Sane
Measure each wall segment and write the numbers on the stud. Set the miter saw to 45 degrees for outside corners, and use a coping saw for inside corners — old houses are never square. Dry-fit each piece before nailing. On high ceilings, that means dragging a step ladder along the wall, so have a second person hand you the board. I use a 23-gauge pin nailer with 1-1/4 inch headless pins. Most crown uses a 38-degree spring angle; a $30 digital angle finder removes the guesswork. Then comes caulk: not just seams but the gap between crown and ceiling. On a wavy plaster ceiling, that gap can be a quarter inch. Two passes with a damp rag give you the crisp line that makes the room look expensive. Budget one hour of caulking for every ten linear feet, and don't rush it. Still, it's the kind of job where two people make it five times easier.

The Mistake That Costs the Most
The biggest mistake I see isn't cutting the wrong angle. It's skipping the caulk. A friend of mine spent three weekends hanging crown in his 12-foot foyer, then left a 1/8-inch gap between the crown and the ceiling because he thought caulk was for sloppy work. That gap was visible from below and it turned a $600 job into a $50 caulk repair. Do it right the first time. Also, measure twice before buying material. I once ordered 80 linear feet of 7-1/4 inch pine and returned 14 feet because I forgot to subtract the window and door returns. That's a $20 mistake in gas and time.
The Cost-Cut Test: DIY or Not?
Here's the formula I use on every high-ceiling project. Total the linear feet of crown. Multiply by $2 for mid-grade pine or $4 for premium polyurethane. Add 20% waste. That's your supply cost. Then get a contractor's installed price per linear foot and multiply by your footage. If the installed quote is more than three times your supply cost, DIY is worth the weekend. If it's less, write the check. For my 80-foot living room, supply came to $192 and the contractor wanted $1,150 — six times supply. I did it myself and saved $950. That bought a scaffold rental, a coping saw, and a pizza delivery on day two.
Crown molding on high ceilings adds character without touching the floor plan. It also rewards the tape-measure crowd — the people who check the spring angle, the ceiling dip, and the cost per foot before they make a single cut. So measure twice, price it out, and decide with math on your side. Trust the tape, not your eye.




No comments yet — grab the first one.