If you are asking how to install glass tiles for backsplash, you are already ahead of the Thursday-night Pinterest crowd. Glass tile is not ceramic with a fancier face. It is translucent, it can crack at the edges, and it will show every mistake you made under it. I learned this the expensive way on a 1950s rental that I owned for exactly 14 months. So here is the system I use now — with real numbers, a tape measure, and Tim fact-checking every step.
How to Install Glass Tiles for Backsplash: The Honest Math
A glass tile backsplash runs 30 to 40 square feet for a standard kitchen counter-to-cabinet wall. At $8 to $25 per square foot for the tile alone, you are looking at $240 to $1,000. I used an $11-per-square-foot matte subway tile and the total came to $385 for 35 square feet, including the 10% overage. Thin-set, grout, spacers, a trowel, and a float added another $90. If you rent a wet saw for the day, that is $60 to $80. Total for the project: around $550. Compare that with the $1,800 a contractor quoted me for the same wall.
The two numbers that matter before you buy are height and width. Measure the counter-to-cabinet gap in three places, not one. Old houses are not flat. My wall was 3/4 inch taller on the left side than the right. Tim measured it with a laser and I argued for ten minutes. He was right. I was annoyed. That variance is why you order 10% extra — not for broken tiles, but for the cuts you will make when the wall laughs at your straight line.

What You Need (and What You Can Skip)
You do not need a full wet saw for straight cuts. A manual snap cutter works for 4x12 glass tiles if you score firmly and snap fast. But if you have outlets, corners, or a window edge, you need a wet saw. Rent one instead of buying — it makes clean cuts without chipping the glass edge. I chipped two tiles using a snap cutter on my first attempt. My dog got the pieces before I could clean them up.
Use white thin-set, not gray. Glass tile is semi-transparent, and gray adhesive will ghost through and tint the finished wall. I use Mapei Kerapoxy or Laticrete's glass tile mortar. Yes, it costs $5 more per bag. That $5 buys you a lot of regret prevention. Also buy a 1/4-inch square-notched trowel, 1/8-inch spacers, a level, and a sponge float. Skip the cheap plastic float. Spend the extra $4.
Step 1: Prep the Wall Like You Mean It
The wall has to be clean, dry, and flat. Degrease with TSP or a degreaser, rinse, and let it dry for 24 hours. If you have any paint bumps or old adhesive, scrape them off. Glass tile will bend over a high spot and crack. I learned this from a friend whose backsplash looked like a relief map of Ohio. Fill any large holes with a drywall patch, sand flat, and wipe off the dust. A smooth wall is not a luxury in glass tile installation — it is the whole job.
Step 2: Spread Thin-Set in Small Batches
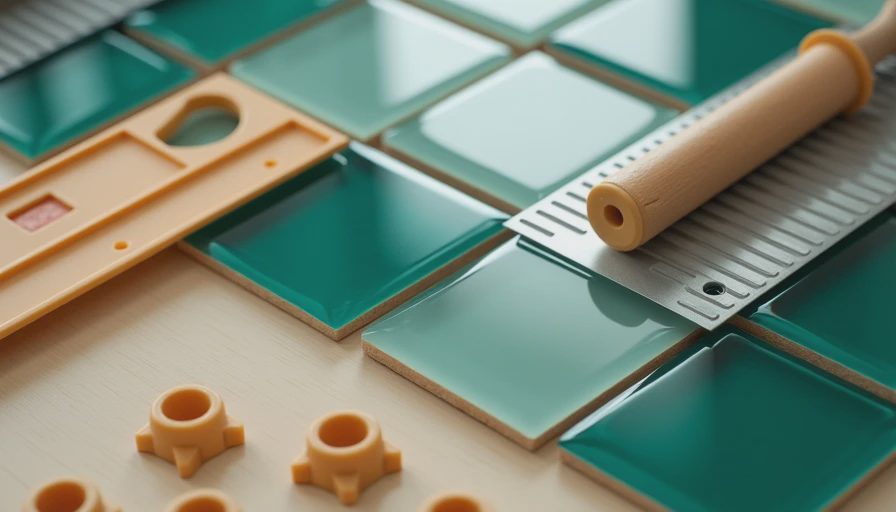
Here is how to install glass tiles for backsplash without the thin-set hardening in the bucket: mix only what you can use in 20 minutes. For a 30-square-foot wall, that is about a quarter of a 50-pound bag at a time. Dump a dollop of mixed thin-set on the wall — for a 4x12 tile, you bed the tile about 1/8 inch thick, so don't drown it. Comb the thin-set with your square trowel to create even ridges. Hold the trowel at a consistent 45-degree angle. If you stop mid-batch to answer your phone, you will be scraping hard ridges off the wall and starting over. I know this because I have two phone calls embedded in a grout line somewhere in a rental I no longer own.
Step 3: Set Tiles, Spacers, and Repeat
Set each tile into the combed thin-set with a slight twisting motion. This collapses the ridges and gives you full surface contact. Use 1/8-inch spacers between tiles — both for the grout line and to keep the spacing even. Press the tile just hard enough; listen for the crunchy sound that tells you it's seated. Check every four rows with a level. If a corner is high, tap it with a rubber mallet or a block of wood. Do not rely on your thumb. The eye is a liar; the level is your witness.
Let the tile set for 24 hours before grouting. Then mix unsanded grout (for joints under 1/8 inch) and push it into the gaps with a rubber float at a 45-degree angle. Wipe diagonally across the joints so you do not pull the grout out. Once the haze forms, clean with a damp sponge — but don't overwork it, or you'll wash out the joint. I use a two-pass method: first wipe removes the bulk, second wipe smooths the line, then a dry cloth does the final polish. That method gave me an even, dense joint with zero haze after it dried.
The 5-Minute Rule for Decisions
If you are standing in the tile aisle trying to choose between two finishes, use Nora's five-minute rule: if you cannot decide in five minutes, buy the cheaper one. Glass tile is not a place to experiment with a color you do not love. It is permanent, and removing it involves a chisel next to your drywall. Choose something you can live with for a decade, not just until the next Pinterest trend.
That is how to install glass tiles for backsplash with a spreadsheet and a steady hand. Measure twice, buy 10% extra, use white thin-set, and rent the wet saw. Trust the tape, not your eye.