I spent 40 minutes choosing a $4 toggle switch and then discovered the box held three cables, two mystery wires, and one screw that had clearly survived the Truman administration. Learning how to replace a light switch is less about being fearless and more about controlling variables. Turn off the correct breaker, identify every wire, take a photo, and work slowly. Trust the tape, not your eye — and in this case, trust the tester even more.
This guide covers a standard single-pole switch, the kind that controls one light from one location. A three-way switch, dimmer, smart switch, or switch in an old house can require a different procedure. The parts usually cost $5 to $25, while a basic electrician visit often starts around $100 and can rise with access problems or outdated wiring. The savings are real, but electricity is not an appropriate place to improvise.
Before You Touch the Cover Plate
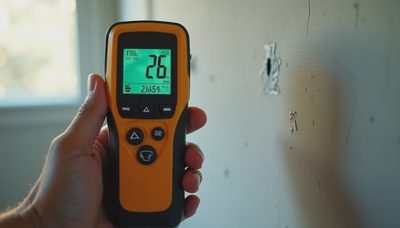
Start by identifying the circuit. Turn on the light, then switch off one breaker at a time until the light goes dark. Do not rely on the panel label; mine once marked the dining room circuit as “upstairs,” which was technically true only if you counted the basement stairs. After switching off the breaker, return to the wall and test the switch box with a non-contact voltage tester.
Test the tester first on a known live outlet. Then test near the existing switch, each wire, and both sides of the box. A dark light does not prove the circuit is dead because the bulb could be burned out or the switch could already be faulty. If the tester indicates voltage, stop and identify the correct breaker. If the breaker will not stay off, call an electrician.
Gather a flat screwdriver, Phillips screwdriver, non-contact voltage tester, wire stripper, needle-nose pliers, electrical tape, and the replacement switch. A phone camera is useful. Before disconnecting anything, take a clear photo showing wire placement and label the cable with tape. Five minutes of labeling beats an hour of guessing.
Confirm the Switch Type and Wiring
A single-pole switch usually has two brass-colored terminal screws and one green ground screw. It may also have a push-in connection on the back, but I prefer side screws for a repair because they are easier to inspect. The replacement must match the circuit rating and load. Most basic residential switches are rated 15 amps, while some circuits use 20-amp devices with a distinctive T-shaped neutral slot on receptacles. Never install a lower-rated switch than the circuit requires.
A standard switch interrupts the hot wire, not the neutral. The hot conductor is commonly black, but old homes often contain faded insulation, painted wires, or previous-owner decisions that deserve their own documentary. The neutral is usually white, and the ground is bare copper or green. Color is evidence, not proof. Follow the existing connections and test before handling.
Stop if you find aluminum wiring, cloth insulation that is crumbling, knob-and-tube wiring, scorch marks, melted plastic, loose connections, or a metal box with confusing bonding. Also stop if the box contains a bundle of wires you cannot confidently identify. In a 1920s house, “it looks simple” is not an electrical diagnosis.

How to Replace a Light Switch Step by Step
First, remove the cover plate and set its screws in a small cup. Remove the two screws holding the switch to the electrical box, then gently pull the switch forward without yanking the wires. Take your reference photo now if you did not take one earlier.
Loosen the terminal screws and remove the wires, or cut and strip them only if the existing ends are damaged. Keep the wires separated and prevent them from slipping back into the box. On a single-pole switch, one hot wire connects to one brass screw and the switched leg connects to the other. These two terminals are interchangeable on a basic switch, but the ground terminal is not.
Form each wire into a clockwise hook so tightening the screw draws the wire inward. Place the ground wire on the green screw and tighten it firmly. If the box is metal, grounding may involve a pigtail connection rather than simply attaching the ground to the switch. Do not cram multiple wires under a terminal unless the device instructions specifically allow it.
If you are learning how to replace a light switch because the old device is loose, resist the temptation to reuse damaged screws or shove the switch into the box at an angle. Fold the wires neatly like an accordion, keep the ground positioned away from the hot terminals, and tighten the mounting screws evenly. A level switch is not electrically necessary, but it prevents the cover plate from looking crooked — and I have spent too long fixing crooked details to pretend that does not matter.
Test Before You Close the Wall
Before reinstalling the cover plate, turn the breaker back on and test the switch. Keep your hands away from the exposed terminals while power is restored. The light should turn on and off cleanly without buzzing, crackling, flickering, heat, or a burning smell. Turn the breaker off again before putting the cover plate back on.
If the light stays on constantly, the switch may be wired incorrectly or the wrong wires may have been connected. If it does not work, turn off the breaker and recheck the connections against your photo. Do not repeatedly reset a tripping breaker. A trip can indicate a short circuit, damaged insulation, an overloaded circuit, or a problem elsewhere in the branch wiring.
Smart switches create additional requirements. Many need a neutral wire in the box, and some require a minimum load, compatible LED bulbs, or a hub. A dimmer must be rated for the bulb type and wattage. Learning how to replace a light switch with a smart model starts with reading the manufacturer instructions, not with assuming every wall box contains a neutral.

When the Electrician Is the Budget Choice
A $10 switch is not a bargain if the repair creates a damaged circuit or an insurance headache. Call a licensed electrician when the wiring is aluminum, the insulation is brittle, the box is overcrowded, or the circuit has no reliable ground. Call immediately for sparks, smoke, heat, repeated breaker trips, or a shock — even a mild one.
An electrician can also correct a box that is loose, too shallow, or buried behind the wall surface. Old houses often have plaster thicknesses that leave modern devices sitting too far back or too far forward. The repair may cost $150 to $300 depending on access and local labor rates, but that is cheaper than opening a finished wall twice because the box could not safely hold the device.
For renters, replacing a switch may violate the lease or local rules even when the task appears straightforward. Ask the property manager instead. For homeowners, a small electrical repair is a useful skill only when the boundaries are clear.
A Five-Minute Final Checklist
Before calling the project complete, verify five things: the breaker is identified and labeled accurately, the replacement switch matches the circuit rating, the hot and switched wires are on the correct terminals, the ground is connected, and the switch operates without heat, noise, or flicker.
Take one final photo of the finished wiring before the cover plate goes on. Write the switch type and installation date on a note inside the electrical panel. The next owner, future you, or a skeptical spouse named Tim will appreciate the evidence.
The repeatable formula is simple: identify, de-energize, test, photograph, label, replace, retest, and stop when the wiring stops making sense. That is how to replace a light switch without turning a $10 upgrade into a $300 lesson. Trust the tape, the tester, and the part of your brain that knows when a mystery wire is asking for professional help.