I spent $186 on plants before measuring the light. Three weeks later, the hostas looked excellent and everything else looked like it had filed a formal complaint. This is why gardening tips should begin with data, not a cart at the garden center. My 1920s house has four different light patterns, compacted soil near the foundation, and one golden retriever who considers mulch a snack tray.
The system below is for an ordinary old-house lot, not a botanical garden with a full-time staff. You will need a tape measure, a cheap soil test, a notebook, and about 30 minutes of observation. The goal is simple: buy fewer plants, place them correctly, and avoid paying twice for the same mistake.
Start with a Sun and Water Map
The first of my useful gardening tips is to map conditions before choosing a plant. Stand outside at 9 a.m., noon, and 3 p.m. on a clear day. Mark each bed as full sun, partial sun, or shade. Morning shade with afternoon light behaves differently from afternoon shade, especially during a hot July week.
Also mark where water collects after rain. Old houses often have downspouts that discharge too close to the foundation, creating a damp strip that kills plants labeled for dry soil. A $12 downspout extension can solve more problems than a $40 bag of specialty compost. Keep planting beds at least 6 inches below siding and avoid piling mulch against brick, wood, or foundation vents.
My map revealed that the east side of our house receives roughly four hours of direct light, while the south bed gets seven or more. Ferns and coral bells now occupy the east side. Coneflowers and ornamental grasses handle the south bed. Trust the tape, not your eye — and in this case, trust the clock too.

Test Soil Before Buying Amendments
More gardening tips become expensive when the soil is treated like a mystery. Buy a basic soil test kit for about $10 to $20, or use a local extension service if one is available in your area. Test pH and identify whether the bed is sandy, clay-heavy, or rich in organic matter. Do not automatically add lime, fertilizer, or peat moss because a neighbor said their tomatoes liked it.
A common old-house problem is construction debris buried beneath a former flower bed. I found gravel, plaster fragments, and a rusted hinge under one border. The bed drained too quickly and had almost no usable topsoil. We removed the obvious debris, added about 3 inches of compost, and mixed it into the upper soil rather than creating a soft layer on top. That took two afternoons and cost approximately $85 in bulk compost. It was cheaper than replacing dead perennials every spring.
Use gardening tips as a decision filter: if a plant needs consistently moist soil and your bed dries within a day, either improve the soil or choose a drought-tolerant plant. Do not expect watering to compensate for the wrong location forever.
Choose Plants by Function and Mature Size
The prettiest plant on the nursery bench is often the least useful one for an old-house bed. Begin with function. Do you need erosion control, screening, pollinator flowers, evergreen structure, or a low border that will not block windows? Write that answer down before browsing.
Then check mature width, not the small plastic pot width. A shrub listed at 5 feet wide needs roughly 30 inches of clearance from a walkway if you want to pass without brushing against it. Perennials should generally be placed according to their mature spread, even if the bed looks sparse during year one. I ignored this rule with a compact hydrangea. It now occupies the exact walking path Tim uses to reach the garage, and he has measured the detour.
For a manageable starter palette, combine one structural shrub, three to five repeat perennials, and one ground-covering plant. Repetition looks intentional and reduces the number of separate watering requirements. Gardening tips that recommend twenty different species sound adventurous; in a small yard, they often create twenty care schedules.
Build Pet-Aware Beds Without Making Them Ugly
A dog changes the math. Avoid sharp edging, unstable decorative rocks, cocoa mulch, and plants you have not verified as pet-safe. Even plants considered low-risk can cause stomach upset if a dog eats a large amount, so the practical solution is physical separation as well as plant selection.
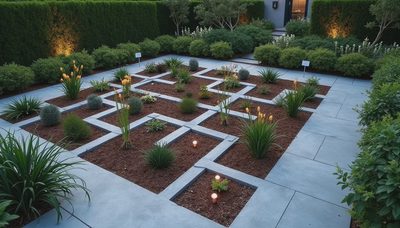
I use a 12-inch steel edging border around the most vulnerable beds and leave a 3-foot route for the dog between the back door and the fence. That route matters more than my original planting plan. Dogs repeat the path that feels easiest; blocking it with a delicate perennial simply turns the perennial into a speed bump.
Choose sturdy plants for the route edges and protect new specimens with temporary wire cloches or simple garden fencing. Remove the barriers once roots are established. Check a reliable veterinary or plant-toxicity reference before adding unfamiliar species, especially bulbs and ornamental plants. These gardening tips are not about making a yard sterile. They are about putting fragile things where paws do not naturally travel.
Spend the Budget Where It Changes the Result
My annual garden budget is about $450, divided before I visit a nursery. I reserve $160 for soil and compost, $100 for plants, $75 for edging or supports, $50 for mulch, and $65 for replacement tools or irrigation parts. The categories shift, but the ceiling stays visible. Without it, I buy six $14 plants and forget the compost the bed actually needs.
Prioritize soil, drainage, and water delivery. A soaker hose costing $25 to $40 can be more useful than decorative gravel. A $20 hand pruner that makes clean cuts is a better purchase than a second style of garden glove. For large trees or shrubs near utilities, spend money on professional guidance rather than guessing. A misplaced root system can create a repair bill that makes the entire flower budget irrelevant.
Buy smaller perennials when the variety is reliable and you can wait a season. A 1-gallon plant often costs much less than a 3-gallon specimen, while the mature plant can catch up with proper watering. Gardening tips about saving money only work when the plant has enough time, light, and soil to establish.
Use a Five-Minute Maintenance Plan
I used to spend one frantic Saturday watering everything and then ignore the garden for ten days. The result was predictable. Now I divide maintenance into short tasks. On Monday, I walk the beds and inspect wilt, broken stems, and chewed leaves. On Wednesday, I pull weeds while the soil is slightly damp. On Saturday, I check hoses, deadhead where useful, and photograph anything that looks wrong.
Water deeply and less frequently rather than sprinkling the surface every evening. Newly planted shrubs and perennials need closer attention during establishment, while established plants should be watered according to weather and soil conditions. A two-inch layer of mulch can reduce evaporation, but keep it several inches away from trunks and stems.
Record the date, plant name, location, and any problem in your phone. Next spring, that note will save you from buying the same plant for the same failed spot. The best gardening tips create memory outside your head, where it can survive a busy week.
The Repeatable Formula
Before buying anything, measure the bed length and width, observe light three times in one day, test the soil, and identify the dog’s preferred route. Select plants by mature size and function. Budget for soil before decoration. Install the water plan before the weather turns hot. Then review the bed every week for five minutes.
This approach will not produce an instant magazine photograph. It will produce fewer dead plants, clearer spending, and a yard that suits the house instead of fighting it. Gardening tips are most useful when they end in a repeatable formula: measure, map, test, choose, plant, and record. That is the whole system. Trust the tape, not your eye.