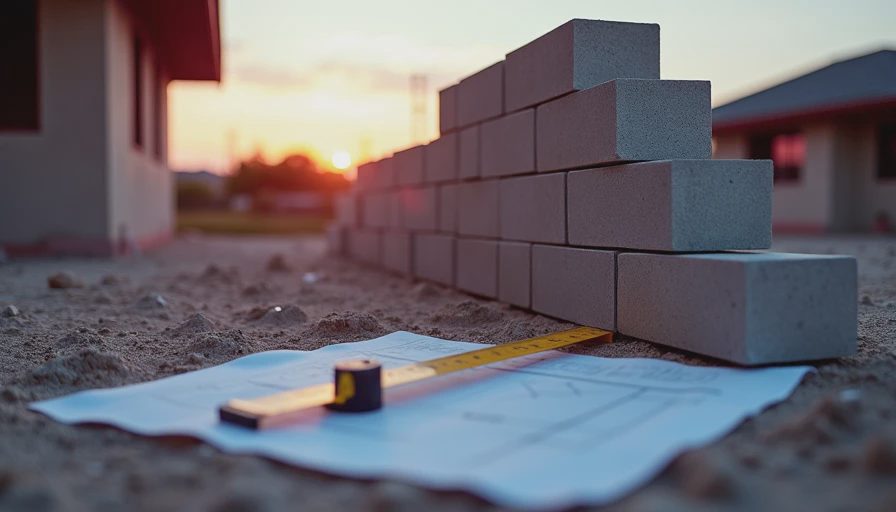
I once stacked six blocks on a Saturday, stepped back, and found one corner off by 3/8 inch. Tim called it in ten seconds; I spent 20 minutes pretending I could eyeball it straight. That is usually how building with cinder blocks starts to cost more than planned. The material looks simple, but the base, drainage, and reinforcement decide whether you end up with a clean wall or a gray apology. Trust the tape, not your eye.
What you are actually buying
Cinder block is the old nickname. What you usually get at the yard is a concrete masonry unit, or CMU — the familiar gray block with two hollow cores. A standard one is 8 by 8 by 16 inches, though half blocks, solid blocks, and specialty units are common too. For a low garden wall, a shed base, or a short privacy screen, that size is predictable and easy to price. At big-box pricing, a standard block often lands around $2 to $4, and the price climbs when you need caps, corner blocks, or delivery.
The trick is to think in systems, not pieces. If the wall needs mortar, rebar, gravel, and a footing, the block itself might be only a third of the bill. That is where people get surprised. A pallet of gray rectangles looks harmless. The invoice does not.
The part that keeps the project level
The first course matters more than the fifth. If the base is soft or uneven, every block above it inherits the problem, and you spend the whole weekend chasing little mistakes with a trowel. For building with cinder blocks, I want a compacted gravel base, a level footing, and a string line before the first block goes down. That means digging enough to remove organic soil, tamping the base, and checking level in both directions. Boring work. Expensive to skip.
Mortar joints are usually about 3/8 inch, not close enough. A slightly thick joint on one end and a skinny one on the other will twist the wall faster than you expect. If you are placing rebar, the bars should line up with the hollow cores and tie into the footing. That is the difference between a wall that stands quietly for years and one that starts talking in cracks after one wet winter.
Budget math before you start
Here is the part I wish people wrote down before driving to the store. A low, non-structural wall can run on roughly $10 to $25 per square foot in materials if you are doing the labor yourself and keeping the finish simple. That range covers blocks, mortar, gravel, basic reinforcement, and a few wasted pieces because nobody measures perfectly on the first trip. A 60-pound bag of mortar mix is often around $8 to $12, and a length of rebar can be $5 to $10. If you need a rented mixer, a tamper, or delivery, add more. Delivery alone can sting if you only need a few hundred pounds but have no truck.
For this kind of project, I like to price by row and by corner. Corners eat extra cuts, caps cost more than plain blocks, and any wall that hides a slope needs drainage material behind it. That can mean another $50 to $200 in washed stone and perforated pipe for a small project. If your wall is tall enough to hold soil or support a roof, the budget jumps again because the math becomes structural, not decorative. That is when a mason or engineer is cheaper than a collapse.
Why cracks happen in the real world
Most ugly block problems are not about the block. They are about water, movement, or impatience. Water gets behind the wall, freezes, expands, and opens up a hairline crack that grows into a stubborn one. If the wall is retaining soil, drainage is not optional. I want gravel behind the wall, a path for water to escape, and a top that sheds water instead of collecting it. If you are painting the surface, wait until the mortar has cured enough that moisture is not trapped inside.
This is where building with cinder blocks stops being a weekend craft project and turns into a small piece of civil engineering. Tim is right about this all the time, which is annoying because I hate when he is right. If the wall is tied into a slab, attached to a house, or supporting meaningful weight, the load path matters more than the finish. You can hide a rough face. You cannot hide a bad foundation.
Finishes that make gray blocks look intentional
Bare block has a very specific look — useful, not warm. If that is fine, save your money. If not, there are cheap ways to make the wall look finished without pretending it is marble. A parge coat can smooth the face. Exterior masonry paint can work once the surface is dry and sound. Stucco adds texture and hides small imperfections. Caps are worth the extra spend because they protect the top edge from water and make the whole wall look deliberate instead of temporary.
I like to spend on the top edge before I spend on decorative extras. A decent cap block or stone cap usually gives you more visual payoff than a fancy color choice. Same logic as curtains in an old house — if the proportions are wrong, the pretty fabric cannot save it. The clean line is what people notice first.
When to DIY and when to call help
If the project is a short garden border, a grill pad, or a utility enclosure under about three feet tall, a careful DIYer can usually handle it with patience, a level, and a friend who can tell you when the third course starts drifting. If the wall will retain soil, carry a roof, sit on sloped ground, or touch a foundation, I stop pretending this is simple. That is when permits, code, frost depth, and reinforcement become part of the job description.
My rule is simple: if I can explain the load path in one sentence, I may try it myself. If I need three sentences and a sketch, I call someone who does this for a living. Building with cinder blocks is affordable when the scope stays honest. It gets expensive when you hope the gray rectangle will behave like a structural plan. Trust the tape, not your eye — and budget for the base before you budget for the blocks.

No comments yet — grab the first one.