A hammock stand looks like a simple purchase until you discover that your “perfect” corner is 18 inches too short. I learned this after ordering one for the side patio, then measuring the box and realizing the assembled frame would block the back door. Tim said, “You measured the hammock, not the stand.” He was right. I was annoyed for the rest of the afternoon.
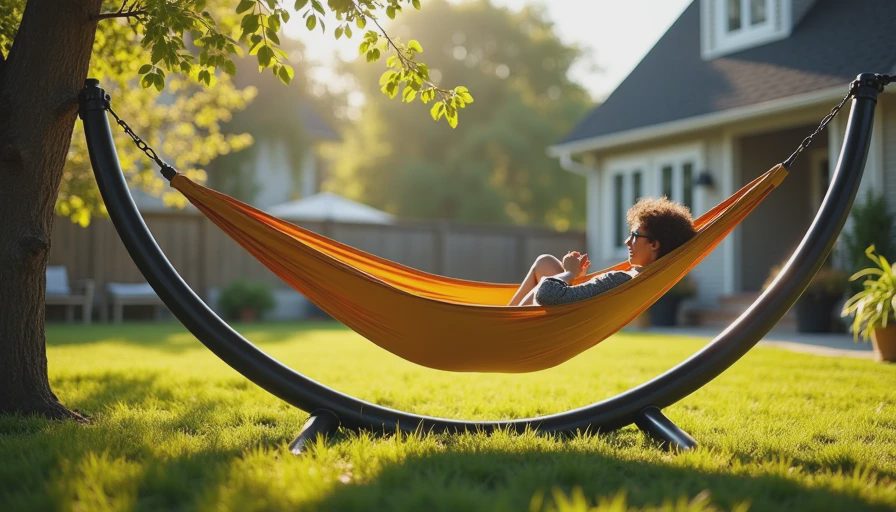
A hammock stand needs more than a pretty finish. It needs the right length, enough clearance for movement, a realistic weight rating, and a base that will not shift when a person sits down quickly. Here is the system I use now — tape measure first, shopping cart second.
Start With the Footprint, Not the Fabric
Most freestanding models measure roughly 9 to 15 feet long, depending on whether they are designed for a single hammock, a spreader-bar hammock, or a heavier double model. The product listing may show the frame length, but you also need usable clearance around it. I allow at least 24 inches on each long side and 30 inches near the head and foot ends. That gives you room to walk around it without treating every relaxation session like an obstacle course.
For a patio, measure from the actual hard edges — columns, railings, steps, outdoor furniture, and the door swing. For a lawn, mark the proposed footprint with painter’s tape or garden stakes. Leave additional room if your golden retriever considers furniture a racetrack. A hammock stand that technically fits in a 10-by-12-foot space can still be a poor choice if a chair, grill, and dog bowl occupy the same rectangle.
Adjustable steel frames are useful when you are uncertain about hammock length. They often let you change the hanging points by several inches, which can solve a fit problem without returning the entire setup. However, adjustability is not permission to ignore the manufacturer’s minimum and maximum hammock lengths. Fabric hanging too tightly increases stress on the attachment points; fabric hanging too loosely can leave you sitting lower than expected.

Choose Capacity With a Margin
Weight capacity is not a decorative number. A 400-pound rating might cover one adult, but it leaves little room for a second person, a child climbing in, or the abrupt load created when someone drops into the hammock instead of easing down. I prefer a hammock stand rated at least 100 pounds above the expected combined user weight. That is a planning margin, not an invitation to exceed the label.
A typical single setup may be rated around 250 to 350 pounds. Double models commonly list capacities from 400 to 600 pounds, though construction varies. Read the rating for the complete stand, not just the hammock fabric. Check the hooks, chains, adjustment holes, welds, and feet. If the product documentation is vague about capacity, that is useful information — skip it.
Steel is usually the practical choice for a budget-conscious outdoor setup. Powder coating helps protect the surface, but scratches can expose metal to moisture and eventually rust. Wood frames can look more at home beside an older house, yet they need more attention to finish, hardware, and seasonal storage. Aluminum is easier to move, although a lightweight frame can be less stable on uneven grass.
Match the Base to the Surface
On a level concrete patio, broad feet with rubber pads can prevent sliding and protect the surface. On grass, narrow feet may sink or rock, especially after rain. I place a compact paver beneath each contact point when the soil is soft — not glamorous, but considerably cheaper than replacing a bent frame.
Do not assume a hammock stand is safe on a slope because the feet touch the ground. A small grade change can shift your center of gravity and make getting in or out awkward. If the location slopes, move the setup to a flatter area or build a level platform designed for outdoor use. Do not improvise with loose bricks under one side; they can tilt or separate under load.
A portable hammock stand is convenient for storage, but convenience has a maintenance cost. Take it down before high winds, heavy snow, or long periods of rain. If you leave the frame outside, inspect the fasteners every few weeks during the season. Tighten loose bolts, look for coating damage, and check that adjustment pins are fully seated.
Make It Work in a Dog-Proof Yard
My dog’s first response to a hammock was not relaxation. It was investigation, followed by a determined attempt to chew the fabric edge. If you have a pet, keep the hammock high enough that it is not dragging on the ground and remove it when the stand is unattended. A loose hammock can become a chew target, a trip hazard, or an expensive collection of holes.
Keep water bowls, toys, and digging zones outside the stand’s footprint. That reduces the chance that a person steps over a dog while entering. I also avoid placing the setup beside a fence where a curious dog can push underneath and destabilize the frame. The best hammock stand location is visible from the house, clear of traffic, and boring to the dog.
For fabric, look for removable material that can be machine washed according to its care label. Cotton feels comfortable but may dry slowly and fade faster in direct sun. Polyester or solution-dyed outdoor fabric generally handles weather more easily. I would rather wash a plain fabric twice a month than protect a delicate one and never use it.
Compare the Real Cost
Entry-level frames often fall near the $70 to $130 range. They can be sensible for seasonal use, a covered porch, or someone testing whether a hammock will actually become part of the household routine. The tradeoff is usually thinner tubing, fewer adjustment positions, or less durable coating.
A sturdier hammock stand commonly costs about $150 to $300, especially when it includes a thicker steel frame, wheels, a longer adjustment range, or a better outdoor finish. Wood models can run higher because the material, joinery, and finishing work add cost. Remember to budget for a replacement hammock, which may cost $30 to $150 depending on fabric and construction.
The cheapest choice is not automatically the lowest-cost choice. If a $90 frame rusts after one season and a $220 frame lasts several years with basic care, the second purchase can have the lower annual cost. I write the expected service period beside the price — an old finance habit that prevents “sale” from becoming a personality trait.
My Five-Minute Selection Formula
Measure the available length and width, then subtract your clearance allowance before comparing product dimensions. Confirm the combined user weight and select a capacity with at least 100 pounds of margin. Match the feet to the surface, check whether the finish is suitable for outdoor exposure, and identify where the frame will live during storms or winter.
Then perform one final test: imagine carrying the hammock stand through the route from storage to its intended location. If it cannot pass through the gate, door, or narrow hallway, its specifications do not matter. I once bought a shelving unit that fit the room but not the staircase. Tim still brings it up whenever I start measuring only the destination.
A good hammock stand is not the most decorative frame in the catalog. It is the one that fits the measured space, supports the actual load, stays stable on the real surface, and can be maintained without a weekly argument. Trust the tape, not your eye.